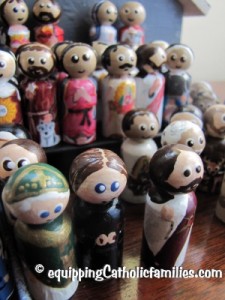
So I’ve been creating my own collection of Wooden Painted Saints…and inventing ways to play with them for a couple years now:
- Wooden Painted Saints Tutorial
- What To Do With Painted Saints
- Passion Play with Wooden Painted Saints
- Snakes & Ladders with Wooden Painted Saints
- Checkers with Wooden Painted Saints
- Trouble with Wooden Painted Saints
- Kelly Saints Cathedral for the Wooden Painted Saints (NEW! This Week with Printable!)
…and then I saw Lacy’s Printable Peg Dolls this week over at
Catholic Icing.
Although Lacy designed her printable for the larger peg doll size, I converted her printable to my smaller 1.75″ peg doll size.
What a great way to build up a Saints collection in a hurry! I made two sets at once, painting the heads and then adding the printable clothing to complete them.
Here are my Tips for Decoupage Saints using Lacy’s cool printable:
TO CONVERT the printable to the SMALLER SIZE PEG DOLL:
If you have the 1-11/16″ Tall x 5/8″ wooden peg doll like I do…(or want to purchase them online at Casey’s Wood Products: they’re only 12cents each if you buy 100!), here is how you convert the printable for proper sizing.
If you print at home, you can easily select to print pages 9-13, scaling them to 48.5%.
Basically, each little clothing image needs to be 2″x 1.25″ to fit around the waist of the little wooden peg doll. You will likely shave up to a 1/16″ off the top or the bottom so that the paper doesn’t bunch up at the neck.
If you choose to send the file to Staples or some other copy shop, apparently they can’t always select a percentage to reduce the printing by. Or maybe it’s just the Staples near me. =) I took Lacy’s advice and used the ‘print screen’ function to cut and paste the images into my trusty Corel drawing program. (with the images visible on screen, hit “Ctrl” and “PrtScn“…and then hit “Ctrl and “v” to paste into your own drawing program.) You will then need to do a little math (sorry about that) to measure how big the image is on your page and convert it to 2″x 1.25″ to get the percentage you will need to shrink it down in your drawing program.
I found that the quality of print was WAY better at Staples than it was on my own printer.
If you choose to print at home, make sure that you spray the images with fixative or hairspray thoroughly and allow to dry before adding mod-podge or varnish! Although I did use hairspray on the images printed at home, the colors still ran a little bit when I added the mod-podge/varnish and were not as crisp…so I quickly sent the images to Staples to print!
Working on two sets at a time made the whole process a little more efficient, time-wise!
I painted two matching heads and then moved on to the next pair allowing for drying time and touch-ups. It’s great to end up with an extra set for my 4 year old to play with!
BIG EYE Saints:
I have developed a certain style for my Wooden Painted Saints and decided that I wanted to make the new crowd of Saints fit right in.
For “Big Eye” Saints, I use the other end of a paint brush (if it tapers to a smallish point), dipping it into the paint and lightly touching it on the face for each eye. The heavier you press the brush, the more paint will be used and the bigger dot you will get for the eye.
I usually start with a bigger white dot, allow it to dry and then add a smaller iris color dot, allow to dry and then add a fleck/highlight with a toothpick for a little sparkle.

PAINTING THE HEADS
I followed the general steps to paint the heads as recommended by Lacy for the hair or head coverings. I added my own faces in my style to help the new Decoupage Saints fit with my Wooden Painted Saints from before.
TIPS for MATCHING HEADS and BODIES:
Once you have painted most of each head, you will want to mod-podge or varnish the printable on for the clothing. Sometimes a little extra paint is needed after to match the head to the body.
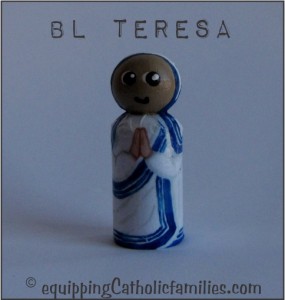 Blessed Mother Teresa is the most difficult to match paint with the printable. First of all, I would recommend painting a plain white head covering before adding the clothing printable…and then adding the blue stripes to fit in line with the blue stripes on the printable. The quality of your print may affect the intensity of the blue and you will likely need to mix paint to get the color to match. I added the fine lines as best I could with a toothpick, but perhaps a blue Sharpie would be easier to work with if you could get a close enough color to match.
Sometimes, my flesh color paint was a little different from the printable. It looks like I forgot to add a little dab of the paint to the hands on a couple of the decoupaged bodies, but it’s never too late. I can add the paint…and spot-coat the area with a little more varnish to complete it.
Sometimes the Saint has long hair! I just added the painted hair on top of the printable (once it was mod-podged in place)
Our Lady of Guadalupe has the little tiny stars all over her cloak and veil! I added a tiny bit of glitter glue to the stars before I varnished and sealed it all in.
With these few little touch-ups, the paint and the printable match up pretty well, especially once the mod-podge or varnish is added to the whole saint.
Don’t forget to check out the Kelly Saints Cathedral Craft Kit Printable released this week!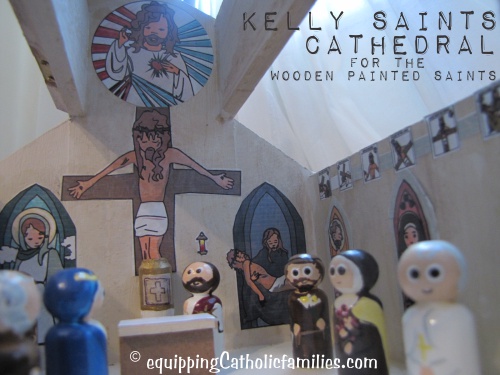













LOVE IT!